As I mentioned yesterday in my bagels & lox post, this month’s Charcutepalooza challenge – brining – had visions of pastrami dancing in my head within minutes. With rye, mustard, and pickles, obviously. Somehow, I made it happen.
My great grandmother Celia – for whom I’m named – owned a store back in the day in New York. She sold barrels of pickles, so I wanted to do her proud on that front. I found a couple of recipes for dill pickles in The Complete American Jewish Cookbook and combined them to produce something tasty that I could can and have ready in a week. The classic pickling method, you see, involves keeping your pickles in brine in an unsealed jar for weeks on end: this lets them sour and keeps them crispy. Sadly, I have no time or space for a crock of pickles in my life right now, so I decided to try out regular hot canning. I knew this would reduce some of the crispness of my pickles, but they came out quite alright in the end; I highly recommend this pickle recipe and method for at-home picklers who don’t have weeks to brine cucumbers. The results:
Pickles were the easy part of this, though. The main dilemma: how to smoke pastrami in a New York apartment? It’s kind of ironic that it was such a challenge to figure out how to make pastrami in New York in tribute to my great-grandma, a New York Jew. This city rewards ingenuity, though. Or, at least, it has a heck of a lot of specialty stores. Here’s what I worked out. I started with Michael Ruhlman’s corned beef recipe, using pickling spice (from Ruhlman’s recipe), salt, and sugar to create a brine.
Next order of business: immerse my brisket (only 3 pounds – there’s only one of me) in the brine for 5 days. Again New York made things particularly difficult: apartment fridges here are not full-sized, so mine got really, really crowded with curing meat, fish, and veggies. Still, my roommate and I managed, and after 5 days I had a nice, grey piece of meat: not great to look at, but still gloriously meaty. Perhaps cured brisket can go in the same “sexy ugly” category as Mick Jagger.
Now, I had to smoke it. Also in my tiny New York kitchen. Thankfully, another New Yorker has trod this path before me: I was able to take some tips from Mark Bittman’s adventures with oven-smoked ribs. After trawling the internet, I managed to work out a rub and a smoker setup. The rub: grind together 3 tbsp. peppercorns, 3 tbsp. whole coriander, 4 tbsp. smoked paprika, 2 tbsp. mustard seeds, and 3 tbsp. brown sugar. Add 6 garlic cloves, minced.
For the smoker, I picked up a bag of hickory chips at The Brooklyn Kitchen, soaked them for a hour, and placed them in the bottom of a large aluminum roasting pan. I banked the chips up on the sides, put some heavy duty in the middle to make an ad hoc drip pan, and put a rack in the middle so smoke could circulate around the brisket.
Then I tented heavy duty aluminum foil over the setup, careful to leave space between meat and foil, and sealed it securely to keep in smoke and steam. Brisket dries out really easily, so it’s important to keep all its moisture in. I cooked it for 4 hours at 225 degrees – just over 1 hour and 15 minutes per pound. And when it came out it was gorgeous and steaming…and looked lovely against the New York skyline.
But where’s the rye, you ask now. What are you going to do with all that meat if you don’t have bread to put it on? Good question. I was thinking the same thing myself. I checked The American Jewish Cookbook, which had a rye recipe, but in the end I decided to go with a trusted modern source: Bernard Clayton’s New Complete Book of Breads. This book has served me well in the past, and the rye recipe looked very thorough. Plus, it required that one set a sour up overnight and this worked nicely with my timing. I was also enchanted by the fact that it required that one put a bag of chopped onion in cheesecloth in the middle of the sour. Pulling this out the next day was kind of gross, but fun.
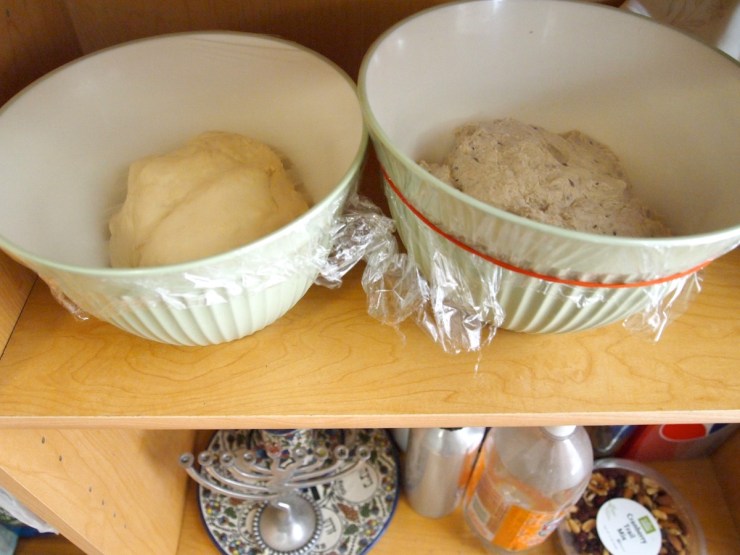
Clayton also insisted very firmly that he had the secret to great rye bread: old rye bread. This needn’t be great bread (I used sliced commercial stuff) but apparently when soaked in water and mixed in this stuff – called altus – intensifies taste and moisture. The bread sure rose nicely. Here it is, along with my bagel dough; I promise didn’t notice the highly appropriate Judaica on the bottom shelf when I first took this picture.
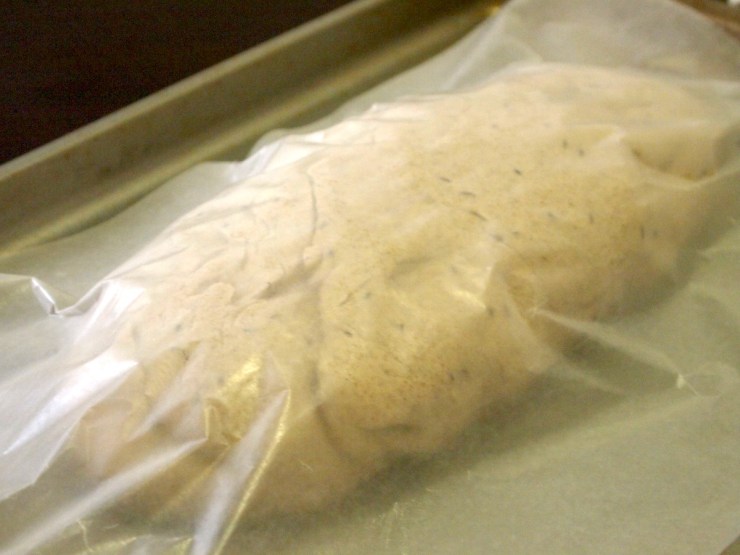
I only made two-thirds of a bread recipe. I thought this would yield one reasonable loaf: the dough was a decent size when I proofed it.
And then it baked into a monster. A delicious, gorgeous golden monster bread.
Yum. There really is nothing to top fresh bread. Except maybe fresh bread with pastrami and pickles. Keep tuned: we’re wrapping up tomorrow with a little condiment post on mustard and cream cheese!
Rye Bread (Adapted from Bernard Clayton) (Makes 2 large loaves)
6-9 slices rye bread
3 c. Rye Sour (recipe below)
1 package dry yeast
1 tbsp. salt
2 tbsp. caraway seeds
4 c. bread or unbleached flour
1 egg, beaten, mixed with 1 tbsp. water
1. Soak the previously baked rye in water, squeeze it dry, and set aside 1 1/2 cups for this recipe.
2.** Place the squeezed-out bread and the sour in your food processor and blend lightly, using your paddle attachment. Add the yeast, salt, and 1 tablespoon of caraway seeds, mix briefly, and let the mixture stand for a couple of minutes to allow the yeast to dissolve.
3.** Add the flour, 1/2 cup at a time, mixing briefly after each addition, until the dough becomes dense and adheres to the paddle in a ball.
4. Scrape the dough off the paddle, put your dough hook attachment on, and knead on medium for 5 minutes until the dough becomes nice and elastic. It may still be a little sticky. You can also knead by hand for 5-8 minutes on a lightly floured surface.
5. Place the dough in a bowl, cover with plastic wrap, and let it rise at room temperature for 30 minutes.
6. Punch down the dough and turn out onto a floured work surface. Divide it in half and form either round loaves or long plump ones. Place the loaves on a heavy baking sheet, cover them with wax paper (I used a cloth as well), and let them rise for 30 minutes more. They should reach three-quarters volume, not the full double-volume proof you might be used to for other yeast breads.
7. While the bread is proofing, preheat the oven to 450 degrees. Pour 1 cup hot water into a pan on the bottom shelf a few minutes before putting in the loaves, or toss a half cup into the bottom of the oven just before you put the loaves in, and just after. This will create the steam needed for a crisp crust.
8. Cut the top of the loaves into a pattern (diagonal slashes are traditional) with a razor blade or sharp knife. Brush the top with the egg-water mixture, sprinkle with remaining caraway seeds, and place in the hot oven.
9. Bake for about 40 minutes, turning the loaves around halfway through so they brown evenly. Turn one loaf over and tap the bottom crust to determine if it is done: it should sound hollow and crusty. If it does not, return to the oven for 5 to 10 minutes. Cool the bread on a metal rack when it’s done.
**These steps can also be accomplished by hand with a wooden spoon.
Rye Sour (Makes 4 cups)
1 medium onions, coarsely chopped
2 c. rye flour, stone-ground preferred
1 3/4 c. hot water (120-130 degrees)
1 package active dry yeast
1/2 tbsp. caraway seeds
Length of cheesecloth
1. Make a bag with the cheesecloth and tie the onions inside.
2. Mix the rye flour and water in a large bowl. Sprinkle the yeast and caraway seeds on top and work them in.
3. When the mixture is thoroughly blended, push the onions down into the center of it. Cover tightly with plastic wrap and let it set in a warm place overnight (no more than 24 hours). Do not refrigerate.
4. Lift the onions out, scrape the sour off the cloth, and discard the onions. Use the sour now, or refrigerate for later use. (Stirring and feeding will keep it alive in the fridge for several weeks.)
Dill Pickles (Makes 4 pints)
12 Kirby cucumbers, ripe and crisp as possible
1 bunch fresh dill
4 cloves garlic, peeled
1 qt. plus 1 c. water
2/3 c. white vinegar
1/4 c. kosher salt.
1 tbsp. pickling spice
1. Boil four Ball jars to sterilize them. Divide the dill into quarters and pack one bundle in each jar. Add 3 whole cucumbers and a clove of garlic to each pint.
2. Mix the water, vinegar, salt, and pickling spice and boil for 5 minutes until the salt dissolves. Pour this brine at once over the cucumbers to within 1/2 inch of the tops of the jars, straining out the pickling spices, and seal the jars by submerging them in boiling water for 10 minutes. Do not over-boil or your pickles will get really mushy.
3. Cool the jars to room temperature and let them mellow in the fridge for several days before enjoying them.


Oh my goodness Celia, SO IMPRESSED with all you managed to make in your tiny NY kitchen (and I love the peek at the apartment buildings in that one photo!). Pickles, pastrami and rye bread? You are my absolute hero. Bread and I have a tempestuous relationship. I need lessons!
This is one serious post! Look at all that deliciousness you’ve made here! I’m very impressed with your ability to smoke a brisket in an apartment. Makes me think I can do it in my 300 sq ft too!
OK, seriously. Can I come over?! You’re totally inspiring me.
Celia, wonderful post! I am so glad to see that you were able to smoke in your NY apartment. I will have to smoke in my apartment for the next challenge, and my stove doesn’t even have an exhaust over my stove…
I love the look of your rye bread, beautiful!
I am totally speechless how you made this…amazing!!!
You are unbelievable! This post from beginning to end made me drool. How do you do this?! Teach me? *whimpers* please? Looks like another hit! Thank you for sharing :p
Great job, Celia!! Wow… bravo!
Your bread looks amazing! Pastrami sandwiches were one of the many things I used to pig out on at the deli I worked at in high school – I think I need to go relive those moments!
Wow, you put some work into this!!! Looks AWESOME. I want it now.
You are on a roll, lady!! When did you find the time to do all this? AND go to law school? Please tell me you’re on spring break, haha.
I’m rather belatedly getting through this month’s charcutepalooza posts, and have to say this looks great! I’m impressed by your smoker and may have to rig up a similar device for the next challenge! did you have any issues keeping the wood chips lit/smoking for the full cooking time? I was concerned that I’d have to keep re-lighting the chips.